

How to Install a 350Z/G35 Knock Sensor & Harness
These 350 Zs are notorious for blowing the knock sensors and the knock sensor harness but if you know
these motors then you know the knock sensor is an absolute pain to get to. If you look on the front of the
de motors as a whole and inside are the knock sensor it's down and there, you can kind of see it it's
hard to get a light on it but basically, it is in here and it's on the inside of the motor.

Detects pings in the motor and it adjusts the timing depending on the pings, well when the harness
goes bad which is usually what does go bad because it sits on the motor and it usually burns through
the harness. It doesn't detect the pings and it messes your timing up so when you're stepping down
on gas you're wide open throttle it adjusts the timing at the wrong times

Kills your power and feels like you're driving a car with 30 horsepower, so what we're gonna do
today is we're going to take everything apart. We got to take the upper plenum off the middle plenum
and the lower intakes. Take that all out and then there's the knock sensor, pull it out, redo the harness,
anything that you guys will have to do that we already have done is the strut bar we've already taken
out it's somewhere over here. That was when we did the spark plugs we knew we were going to be
doing the knock harness and sensor, so we didn't put that back in but that is usually for twelve or
fourteen-millimeter bolts I believe those twelves on this car. Then that will just pull right off and then I
guess once you get there if you are exactly where we are so let's get started.
all right guys so this is pretty much everything you're going to need
1) a Phillips's head
1) a Phillips's head
2)a flathead
3)pair of pliers ten millimeters
if you have an impact wrench go ahead and bring that out because that just makes the job a lot easier.
Because there's a bunch of ten millimeters to go around the top of the plenum and of course having an
automated tool just makes life a lot easier than hand-tooling everything

So we got the intake pretty much removed and out of the way we went around the plenum and took
all of these bolts and brackets off, all the way around and then we took the ones off in the middle there
are two tubes in the back one of them is for the intake and the others for the throttle body I believe.
You got to take them off but I always like to take loosen up the plenum first that way you can kind of shift
the plenum up and then have somebody also help you take the ones off the back it just gives you more
room since it's a little tight there in the back, so that's what we are gonna do now.
Alright as you can see I've got Vinnie holding up the plenum so that gives you a 30 in there yeah it's
pretty dirty it's gonna be these plenums well these cars burn oil so a lot of the oil gets caught here,
in the top upper plenum and middle put plenum. If you don't have a PCV delete or oil catch can so that's
not a worry you can always clean this up so don't worry about those guys I know, it's gonna look very
nasty in there, as you can see he's holding it up which gives us good it gives us access to these two
tubes

So you got want to get the pair of pliers and you're gonna want to loosen these clamps
take those off and then the entire upper plenum will come out. I also forgot to mention there is a throttle
body positioning sensor right here that you're gonna want to take off, so you don't want to set the
plenum down and then get an either any of those set of pliers or flathead and just pry that off, alright
as you can see Vinnie's got the upper plenum here that is completely taken out there's a better look at
all of the bolts and the sensors and what you're looking for, so it's not too difficult and then that leaves
us.
The middle of the plenum so these parts were pretty simple that was probably the hardest part.
There's a little gasket here which you can just kind of pry off, But it's held down by these so you gotta
take ten there's six of them and then that loosens this part up but you do need to take the PCV and slide
it off this rail. So once you slide that PCV off that'll free that take off this middle section will pull up which
removes the rest of that gasket and then we can take that section off.
all right we got the middle part of the manifold out so this is the lower part and the fuel rail and injectors,
this part is a little tricky you're gonna want to take it slow if you've never done this before, basically
I know the car looks like it's an inline-six it is not that's just the way that it is on the V cues.
You're gonna definitely want to get towels or something and cover this because if you drop a bolt in
any of those, you're screwed so we got some towels and rags we're gonna basically just stuff them
down in here so that way nothing falls in there all that's left is we got to loosen the fuel rail which is
I believe a 12 12 12 and a 12 there's gonna be four of them, then there are some clips that hold the
injectors in or the injector harnesses in this entire fuel rail we're will then shift up like that it's not going to
totally come out, it's just going to shift towards the rear what I like to do is get a zip tie and you can zip
tie it to the hood just to hold it up and that will give us access to these bolts under here and you take
those bolts out which they are I believe also twelve take those six out and that's going to take out that
lower plenum, and that is going to expose our knock sensor, all right so now that we got that out basically
what I like to do is I like to get the fuel rail tie it up with a couple of zip ties and that will basically leave all
of this exposed

Give you plenty of room to work so that will give us access to these eight, they're in the
back so I thought that was six there's eight I've done this quite a while. When you pull the fuel injectors
out there are these little plastic spacers now this is for the bolts that bolt in the fuel rail and injectors.
You want to take all out of these sockets and you want to hold on to them because this is just to keep
the bolts nice and flush against this lower plenum so hold on to these so you do not drop them in the
cylinders as I said.
All right there we are, there's not no she is right there all right so there is your knock sensor held down
with one 12 millimeter bolt and your knock sensor harness now the problem with it is this harness goes
all the way around the back of the motor and plugs into the top of the transmission. It might be the
bottom of the block actually but this stupid harness it's it's such a bad design because here's your
cylinder heads and this harness just basically snakes between them all, and it gets hot so it causes it to
malfunction so just gonna unplug that and then rewire the new one.
All right guys so basically once you all get that out you're gonna need to do the same concept but towels
and cylinder heads because again. If you drop anything in there you are screwed like literally screwed
you will not get it out it will set on top of the valves and you are screwed, so stuff those in there and then
we're gonna go ahead and disconnect there's a harness in there for the knock sensor so you can see
it right there so we're gonna disconnect that sensor and pull the knockout, alright boys we got
the sensor out that is your top harness and that's yeah that's the harness.
Usually, you can tell if it's bad it'll have like a cut in one of the wires. These buyers, those wires, are
good but I mean maybe the harness is good maybe it's not but I mean you better be safe than sorry
so just change both of them since you're here. I make it look easy cuz I've done this a ton of times but
the very first time I did it not since I'll tell you it took me two days because figuring all this out was a
pain, this is your knock sensor this is what causes all of your issues doesn't look too bad but it most
likely is bad and that harness is probably bad too, you just can never tell so that is pretty much it just
got to take the sensor or the harness out now and got a cut like this little piece, that keeps it together
with a wire I think it's just like a piece of electrical tape and then, you yeah snake the harness down
and unplug it, underneath.

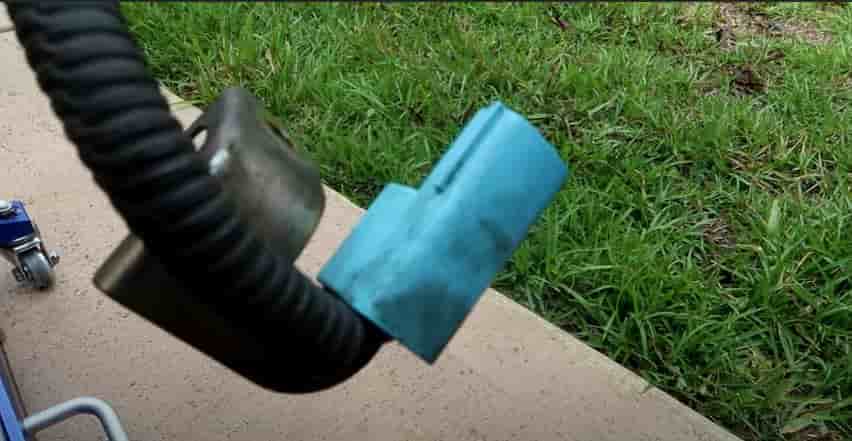
We had to wait to the rain uh dried up and just rain the rest of the night, we are back out here the next
day is nice and sunny now and we can finish this project, so where we left off as we took the knock
seats are out and we have the harness in there so we need to push the harness through which it is
right here we just tucked out of the way. So when you get this harness and we need to push it down to
the back of the motor and we need to get a jack going to have to get a jack lift the side of the car get a
jack stand, of course, make sure it is not.
Usually, you can tell if it's bad it'll have like a cut in one of the wires. These buyers, those wires, are
good but I mean maybe the harness is good maybe it's not but I mean you better be safe than sorry
so just change both of them since you're here. I make it look easy cuz I've done this a ton of times but
the very first time I did it not since I'll tell you it took me two days because figuring all this out was a
pain, this is your knock sensor this is what causes all of your issues doesn't look too bad but it most
likely is bad and that harness is probably bad too, you just can never tell so that is pretty much it just
got to take the sensor or the harness out now and got a cut like this little piece, that keeps it together
with a wire I think it's just like a piece of electrical tape and then, you yeah snake the harness down
and unplug it, underneath.

We had to wait to the rain uh dried up and just rain the rest of the night, we are back out here the next
day is nice and sunny now and we can finish this project, so where we left off as we took the knock
seats are out and we have the harness in there so we need to push the harness through which it is
right here we just tucked out of the way. So when you get this harness and we need to push it down to
the back of the motor and we need to get a jack going to have to get a jack lift the side of the car get a
jack stand, of course, make sure it is not.
The Harbor Freight jack stands are Pittsburgh ones. So we're gonna get underneath the car, we're
gonna pull that harness down, unclip it and then rewire the new one, so I'll show you guys where it's
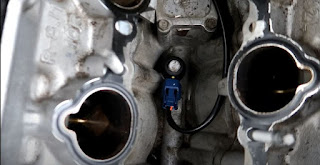
at now. if you look up at the passenger cat this is the cat right here and follow it up there's a blue
sensor, I'm not sure if you can see that it's right there this blue sensor or that harness I mean right
there is your knock sensor harness, so there's a clip.
gonna pull that harness down, unclip it and then rewire the new one, so I'll show you guys where it's
at now. if you look up at the passenger cat this is the cat right here and follow it up there's a blue
sensor, I'm not sure if you can see that it's right there this blue sensor or that harness I mean right
there is your knock sensor harness, so there's a clip.
That's like right there on top of it you have to take that pull it out and then this part of it which is right
there pulls out and snakes up. Then you got to plug a new one into there so that again that teal
harness is the knock sensor harness.
 .
.
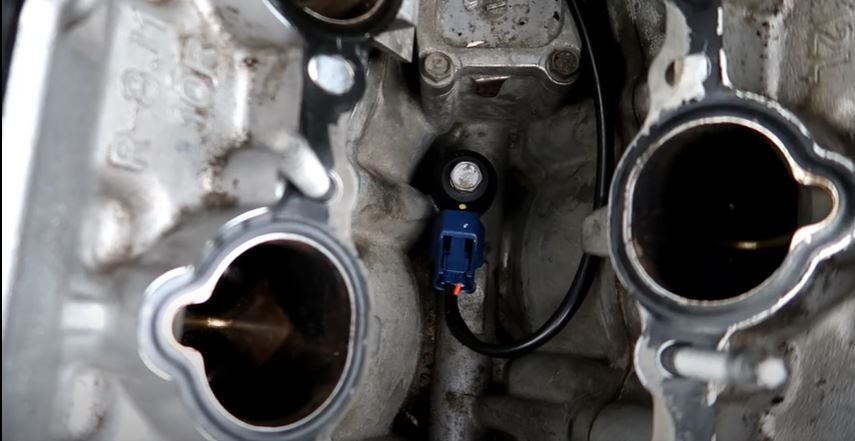
so that's what we got disconnected there's a 10 millimeter bolt I'm sure you can see right there right
above it that is not needed. You don't have to disconnect that that's a bracket that holds the rest of it
we're only changing the piece that connects to the knock sensor, so like I said you got just connect
this right side of it or it's the harness that is on the backside, so to be facing the rear let's get started
that it's a little bit of a pain I'll be honest it's a very very tight squeeze but if you can reach your arm up
there you can somewhat uh loosen it and just tug on it and undo the fastener.
As you can see we got the connector off this is the one that comes off now this is not the one that you,
you are replacing this is just the one that slides off, the one you're replacing is this one right there, so
again the little one stays in the car the bigger one is the one that comes out, now basically the top of it
has a sliding mechanism where you have to pull it, yeah you pull it towards the back of the car, so
you'd pull it this way like that so you gotta pull, that way and that will slide off and then you just have
someone pull it up through the motor, they drop a new harness down you slide it back on plug this
backup.
 .
.
That's what we have to do I cannot physically film it and remove it I don't think I'm gonna try hold on a
second, I just don't think that's physically possible, so we got it out however it's living issue this one
was stuck on there so I didn't have I didn't take this one off the same way I took it off on my car but
depending on your application you might have to do it this way.
I think my clip-on top was snapped so this entire blue harness just slid off but now we can slide it off,
put the bracket on the new connector, and put it back in there. put the bolt back in feed this harness
up to the top install the knock sensor and tighten everything down put it all back in.
 .
.
All right so we disconnected the harness from the clip now we're gonna get the new harness and
there pulls out and snakes up. Then you got to plug a new one into there so that again that teal
harness is the knock sensor harness.

so that's what we got disconnected there's a 10 millimeter bolt I'm sure you can see right there right
above it that is not needed. You don't have to disconnect that that's a bracket that holds the rest of it
we're only changing the piece that connects to the knock sensor, so like I said you got just connect
this right side of it or it's the harness that is on the backside, so to be facing the rear let's get started
that it's a little bit of a pain I'll be honest it's a very very tight squeeze but if you can reach your arm up
there you can somewhat uh loosen it and just tug on it and undo the fastener.
As you can see we got the connector off this is the one that comes off now this is not the one that you,
you are replacing this is just the one that slides off, the one you're replacing is this one right there, so
again the little one stays in the car the bigger one is the one that comes out, now basically the top of it
has a sliding mechanism where you have to pull it, yeah you pull it towards the back of the car, so
you'd pull it this way like that so you gotta pull, that way and that will slide off and then you just have
someone pull it up through the motor, they drop a new harness down you slide it back on plug this
backup.

That's what we have to do I cannot physically film it and remove it I don't think I'm gonna try hold on a
second, I just don't think that's physically possible, so we got it out however it's living issue this one
was stuck on there so I didn't have I didn't take this one off the same way I took it off on my car but
depending on your application you might have to do it this way.
I think my clip-on top was snapped so this entire blue harness just slid off but now we can slide it off,
put the bracket on the new connector, and put it back in there. put the bolt back in feed this harness
up to the top install the knock sensor and tighten everything down put it all back in.
All right so we disconnected the harness from the clip now we're gonna get the new harness and
reconnect it to this clip and then bolt it back up, all right so we have the knob sensor run back down
this is the new one it's gonna plug into right here where the knock sensor is gonna go. If anybody
needs to know how this is to run this right here is the part of the video you need to watch it starts here
and then it goes right here, at the cylinders between the cylinder heads and there's a pipe right here it
goes in between seeing right here it goes underneath. That pipe on top of the cylinder heads and
snakes through to the side kind of see it right there and then it drops down to the inside of the motor,
as you can see if the connectors in that are the connector there's the 10 millimeter bolt that is nice
and tight so the harness is officially done now let me go back up top and plug the knock sensor.
 .
.
All right that is pretty much it for the install we got the knock sensor back in tightening down the
12 millimeters ran the harness but let me show you guys things go bad so it's a really bad design from
Nissan, these are your cylinder heads and this harness is so incredibly long that basically, it twists
and it rides up against either this side of the cylinder wall or this side. This harness just gets so darn
hot that it gets burnt through wires break or this plastic connector gets dry rot and breaks. Most the time the NOx sensor isn't the piece that goes bad it's the harness but since you're here you might as well just change both, now in my case, one of these wires got burnt through, here's the rest of the harness right here literally in pieces it just sits there every day and cooks and cooks and cooks I mean this car what 15 years old so 15 years of heat inside that
this is the new one it's gonna plug into right here where the knock sensor is gonna go. If anybody
needs to know how this is to run this right here is the part of the video you need to watch it starts here
and then it goes right here, at the cylinders between the cylinder heads and there's a pipe right here it
goes in between seeing right here it goes underneath. That pipe on top of the cylinder heads and
snakes through to the side kind of see it right there and then it drops down to the inside of the motor,
as you can see if the connectors in that are the connector there's the 10 millimeter bolt that is nice
and tight so the harness is officially done now let me go back up top and plug the knock sensor.

All right that is pretty much it for the install we got the knock sensor back in tightening down the
12 millimeters ran the harness but let me show you guys things go bad so it's a really bad design from
Nissan, these are your cylinder heads and this harness is so incredibly long that basically, it twists
and it rides up against either this side of the cylinder wall or this side. This harness just gets so darn
hot that it gets burnt through wires break or this plastic connector gets dry rot and breaks. Most the time the NOx sensor isn't the piece that goes bad it's the harness but since you're here you might as well just change both, now in my case, one of these wires got burnt through, here's the rest of the harness right here literally in pieces it just sits there every day and cooks and cooks and cooks I mean this car what 15 years old so 15 years of heat inside that
the motor is gonna break that sensor now.
That's what causes those things to pretty much malfunction but like I said most of the time even
though it's the harness changed the map sensor - you're right here you might as well but that right
there you wouldn't believe how much horsepower you up with that one little mod. My car felt 2 times
faster my butt dyno was very happy after I installed this, so we're gonna start putting everything back
together. Also, don't do what I did. I was supposed to have these sealed and have forgotten I took the
paper out but it's okay we're putting all back together.

Now time to slap everything on you guys already saw how to take it apart so just do that in reverse
order. It's very easy to put the fuel injectors are going to do lower plenum then put the fuel injectors on
middle planner plenum upper plenum and put everything back together to make sure all the bolts are
tight and we'll.
So we're in second gear and we're doing about 25 miles an hour at 3,000 rpm now he's gonna go
ahead and punch. It as you can see it has a lot more power on so it's bringing all the RPMs up now
there's no bogging down, it's chirping tires between second and third so all the power is officially back
on the car. Now we're gonna launch from da dead stuff up through third.
ahead and punch. It as you can see it has a lot more power on so it's bringing all the RPMs up now
there's no bogging down, it's chirping tires between second and third so all the power is officially back
on the car. Now we're gonna launch from da dead stuff up through third.


No comments